- Home
- Cookie Decorating Techniques
- Sugar Cookie Decorating Ideas
- Airbrushing Cookies
Airbrushing Cookies: How to Use, Clean, and Maintain Your Airbrush
Airbrushing cookies is quite easy. When I purchased my PointZero system, I had no idea what I was doing. Needless to say, it was intimidating. The airbrush system was--and still is--amazing. I knew nothing about how to start airbrushing cookies. It actually sat in the box for 2 months!
I will save you the nervousness.
As with anything, you just need to dive in.
This is the page highlights:
- The best and most popular airbrushes for cookies
- Protect your lungs with a respirator mask
- Getting started with perimeter shading
- Airbrushing cookies with stencils
- Airbrushing cookies, blending colors
- The all-important step: disassembling/assembling the airbrush to clean
The first step in airbrushing cookies (I like to deem it art-brushing) is deciding on the airbrush system.
Ah, decisions, decisions.
After scouring reviews on so many brands, it can be quite daunting and can seem even more confusing.
I’ve only had one system since I began airbrushing sugar cookies (and cakes). It has served me so well. Never a glitch. I highly recommend the PointZero Airbrush Decorating Kit.
Several years ago, I bought mine for $130. Guess what? The prices have come down!
It comes with THREE airbrushes. For the most part, I prefer Amerimist airbrush colors by Americolor for their vibrancy. However, Chefmaster is a close second.
Included are both single- and dual-action styluses.
Here is what I purchased...
-3 airbrushes with compressor
-dual and single-action airbrushes
-6’ braided hose and a compressor-mounted airbrush holder for 2 guns
--Read more benefits
Update:
After years of using this airbrush I tout about so often, I purchased this gorgeous cordless airbrush. Just wow. I'm so crazy about this little gem. It is perfect for airbrushing cookies.
I've seen a few cookiers around the internet with them. But I always thought they couldn't work as well as the air-hose kind. Boy, was I wrong!
This cordless will cost about 1/3 of the price of the regular ones. The only thing I need to test yet is how long it will take before recharging. I will be back to update you on this.
***Update: I found after several times of using this sweet tool that the charge lasts a good 4 hours. That was with turning it on and off multiple times for a few seconds to several minutes.
I airbrushed these thank you cookies in a breeze.
It is super good quality. Do I sound excited? I am!
However...I still love my regular one and will continue using it for big orders and when I have more time, when decorating sugar cookies.


- Airbrush with battery
- USB Faster Charging & Longer Working Time: The airbrush gun comes with a USB charging cable
- Package include 1Liquid Extraction Dropper, 5 Spray Gun Cleaner,5 Wash Needles,3 Kinds of Capacity CupsUSB Charging Cable, a User Manual, A Pink Art Airbrush gun

Airbrushing cookies: Step 2, respirator mask…
It’s important to wear a respirator mask while airbrushing sugar cookies. You may not think it necessary, but your lungs will thank you over time.
Take a look at how much is in the filter. Can you imagine breathing all that sticky gunk through your lungs? That's just the right side, too.

These are the filters I order for the 3M 6001 respirator, in a 6-count box. They last a long time.
 Filters for the 3M 6001 respirator
This is the respirator I bought years ago. I'm very pleased with it.


About this item
- NIOSH-APPROVED OV CARTRIDGE WITH P95 FILTER filters at least 95 percent of solids and liquid aerosols as well as certain organic vapors
- FOR WORKPLACE/OCCUPATIONAL USE ONLY
- OIL PROOF P-series particulate filter (Use according to manufacturer’s time use restrictions when oil aerosols are present)
- SOFT, THERMOPLASTIC FACESEAL for excellent comfort
- CONVENIENT, REUSABLE DESIGN
- DURABLE DESIGN for lasting wear
Do you have the airbrushing down to a tee? Ready to learn how to clean the airbrush? Scroll down the page to see the video I made!
Onto sugar cookie decorating ideas with an airbrush...
Airbrushing cookies: Step 3 Perimeter shading…
You naturally need some delicious baked cookies that have been iced with the superior sugar cookie
icing and allowed to dry. If you are a glaze icing person, indulge in this super recipe!
You now have your artist palette to begin airbrushing.
Place the cookie on a paper towel that is on a turntable, if you want one.
Hold the airbrush at a slant.
I use two sizes of turntables for cookie-ing:
- an actual cookie turntable (about 4") under the cookie while decorating
- a larger (about 8") one for airbrushing
The larger one I bought at Dollar Tree was just a cheapy.
This way, I can place a paper towel over it and be able to turn it nicely when airbrushing around the edges of the cookie.
Test the spray by pressing the lever down over a paper towel
to get the feel of it. When you are comfortable with the pressure, move over
the cookie and go around the shape.
Make a second or third swipe if you want a darker color.
If you are here to see how to clean an airbrush, my video tutorial is near the end of this page. Go ahead and pin this image to come back later!

Airbrushing cookies with stencils…

Stencils are also easy.
First, though, you need this incredibly easy tip (speaking of tips, download a free 2-page tip list for royal icing here):
Get some silkscreen material, 110 mesh. Place this on the stencil in your holder to prevent that over-sprayed look. Believe me, this is a game-changer. The mesh you need is on my Silk Screen Cookie Stencils page. Not just any mesh will do.
By the way, you can make wonderful displays of airbrushed cookies with cookie bouquets.
Below, the bunny is a royal icing transfer made from a royal icing transfer sheet.
You can use a cookie projector like mine and physically pipe the design, but airbrushing makes it so fast.
 Be sure to use a 110 silkscreen mesh for airbrushing!
As a side note, I discussed here why you should not use airbrushing to make PYO Cookies.
Okay. Ready for stenciling?
Fill your cup on the handpiece no more than 1/2 way with the color.
Now, unlike the perimeter shading, hold the handpiece as straight up as you can without letting the color spill out. Again, get a feel of the pressure by spraying on the paper towel, then edge onto the stencil setup. Spray the stencil, filling in the areas.
Always go light. If you want a deeper/darker color, spray again after it’s dry. Keep spraying and leave time for it to dry for as dark as you wish. The color will dry surprisingly fast between sprays.
Lift the stencil off.
Ta-dah!
Amazing huh? Great job! How addictive is this?
Airbrushing cookies with overlapping colors
Rainbows, fish, clouds, and grass, etc.
Rainbows are great because instead of spraying out 7 colors, you only need 3. The primary colors are red, yellow, and blue. You won’t even need to rinse out your airbrush in between switching colors.
If you are spraying multiple colors, start with the lightest color to the darkest color. After each color, all you need to do is spray out what’s left in the cup, then add the next color without rinsing the cup out.
After airbrushing cookies: cleaning the airbrush
Now that you have learned about airbrushing cookies, it's time to know how to clean your airbrush. Have no fear, WeCookiers is here! I made a video on taking apart the 2 kinds of airbrushes I use, the regular one with the hose and compressor, and the rechargeable one. Here you go!
What about airbrushing paint-your-own cookie stencils?
Certainly doable and looks great. But…refer to PYO Cookies for further explanation.
The best way of making PYO (paint-your-own) cookies is stenciling a gray color of royal icing or just white on white instead--without airbrushing. No fading. No bleeding. No frustration. Professional.
Another cookie decorating technique is airbrushing portraits on cookies. Intriguing? I’ll upload a video on that as soon as I can.
Has this page helped you? If you have learned something, please consider sharing this page. I do appreciate it, and it helps me to continue helping you, for free. Thank you!
Top of Airbrushing Cookies
Popular pages on WeCookiers:


Yes! I want join and be a free member. Please send me the WeCookier's Express monthly periodical. It's loaded with cookier information. Get cookie-cutter flips, business tips and hacks, inspo, Q&A, and so much more! You'll be an instant WeCookier!
Recent Articles
-
About Nita: Cookie Decorator Behind WeCookiers
May 08, 26 11:53 AM
 About Nita reveals the decorator, teacher, and writer behind WeCookiers, from first cookie tries to major custom orders, classes, and community.
 -
Edible Cookie Images: Best Printer and Application
May 08, 26 11:45 AM
 Edible Cookie Images explained clearly: choose the right printer, learn placement on royal icing, and avoid common maintenance mistakes with ease.
 -
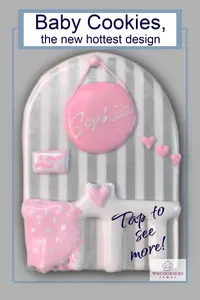
Decorated Baby Shower Cookies: Ideas & Techniques
May 08, 26 11:32 AM
 Decorated Baby Shower Cookies ideas, easy techniques, popular cutters, and royal icing transfer templates to help you create sweet baby cookie sets.
